AWS / EC2
Get started
Step 1: Get your AWS credentials
See Get credentials.
Remember your Access Key and Secret Access Key.
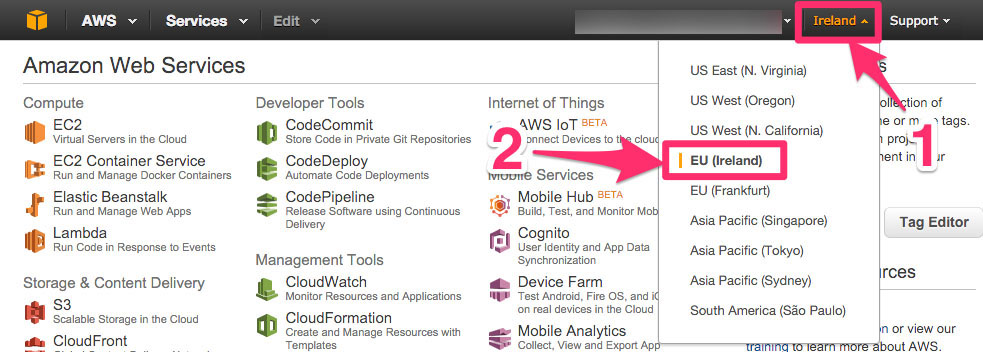
Step 2: Connect to your region
Step 3: Create a security group
Step 4: Choose an AMI
Public AMI are available for theses regions:
eu-west-1 / t1.micro: ami-c74d0db4
eu-west-1 / t2.micro: ami-485fbba5
eu-west-1 / t2.nano: ami-06220275
If you cannot find your region, you can Copy an AMI from a region to another.
Step 5: Update configuration
Open conf.json:
{
  "providers": [
    "type": "awsec2",

    "region": "eu-west-1",
    "instance": {
      "InstanceType": "t1.micro",
      "ImageId": "ami-c74d0db4",
      "SecurityGroups": [ "forward-proxy" ],
    }
  ]
}
And update region and ImageId with your parameters.
Configure Scrapoxy
Options: awsec2
For credentials, there is 2 choices:
Add credentials in the configuration file;
Or Use your own credentials (from profile, see the AWS documentation).
Option |
Default value |
Description |
|---|---|---|
type |
none |
Must be awsec2 |
accessKeyId |
none |
Credentials for AWS (optional) |
secretAccessKey |
none |
Credentials for AWS (optional) |
region |
none |
AWS region (example: eu-west-1) |
tag |
Proxy |
Name of the AWS / EC2 instance |
instance |
none |
|
max |
none |
Maximum number of instances for this provider. If empty, there is no maximum. |
Options: awsec2 / instance
Options are specific to AWS / EC2.
Scrapoxy use the method runInstances to create new instances.
Standard options are InstanceType, ImageId, KeyName, and SecurityGroups.