Tutorial: DigitalOcean - Create an image
Step 1: Connect to your DigitalOcean console
Go to DigitalOcean console.
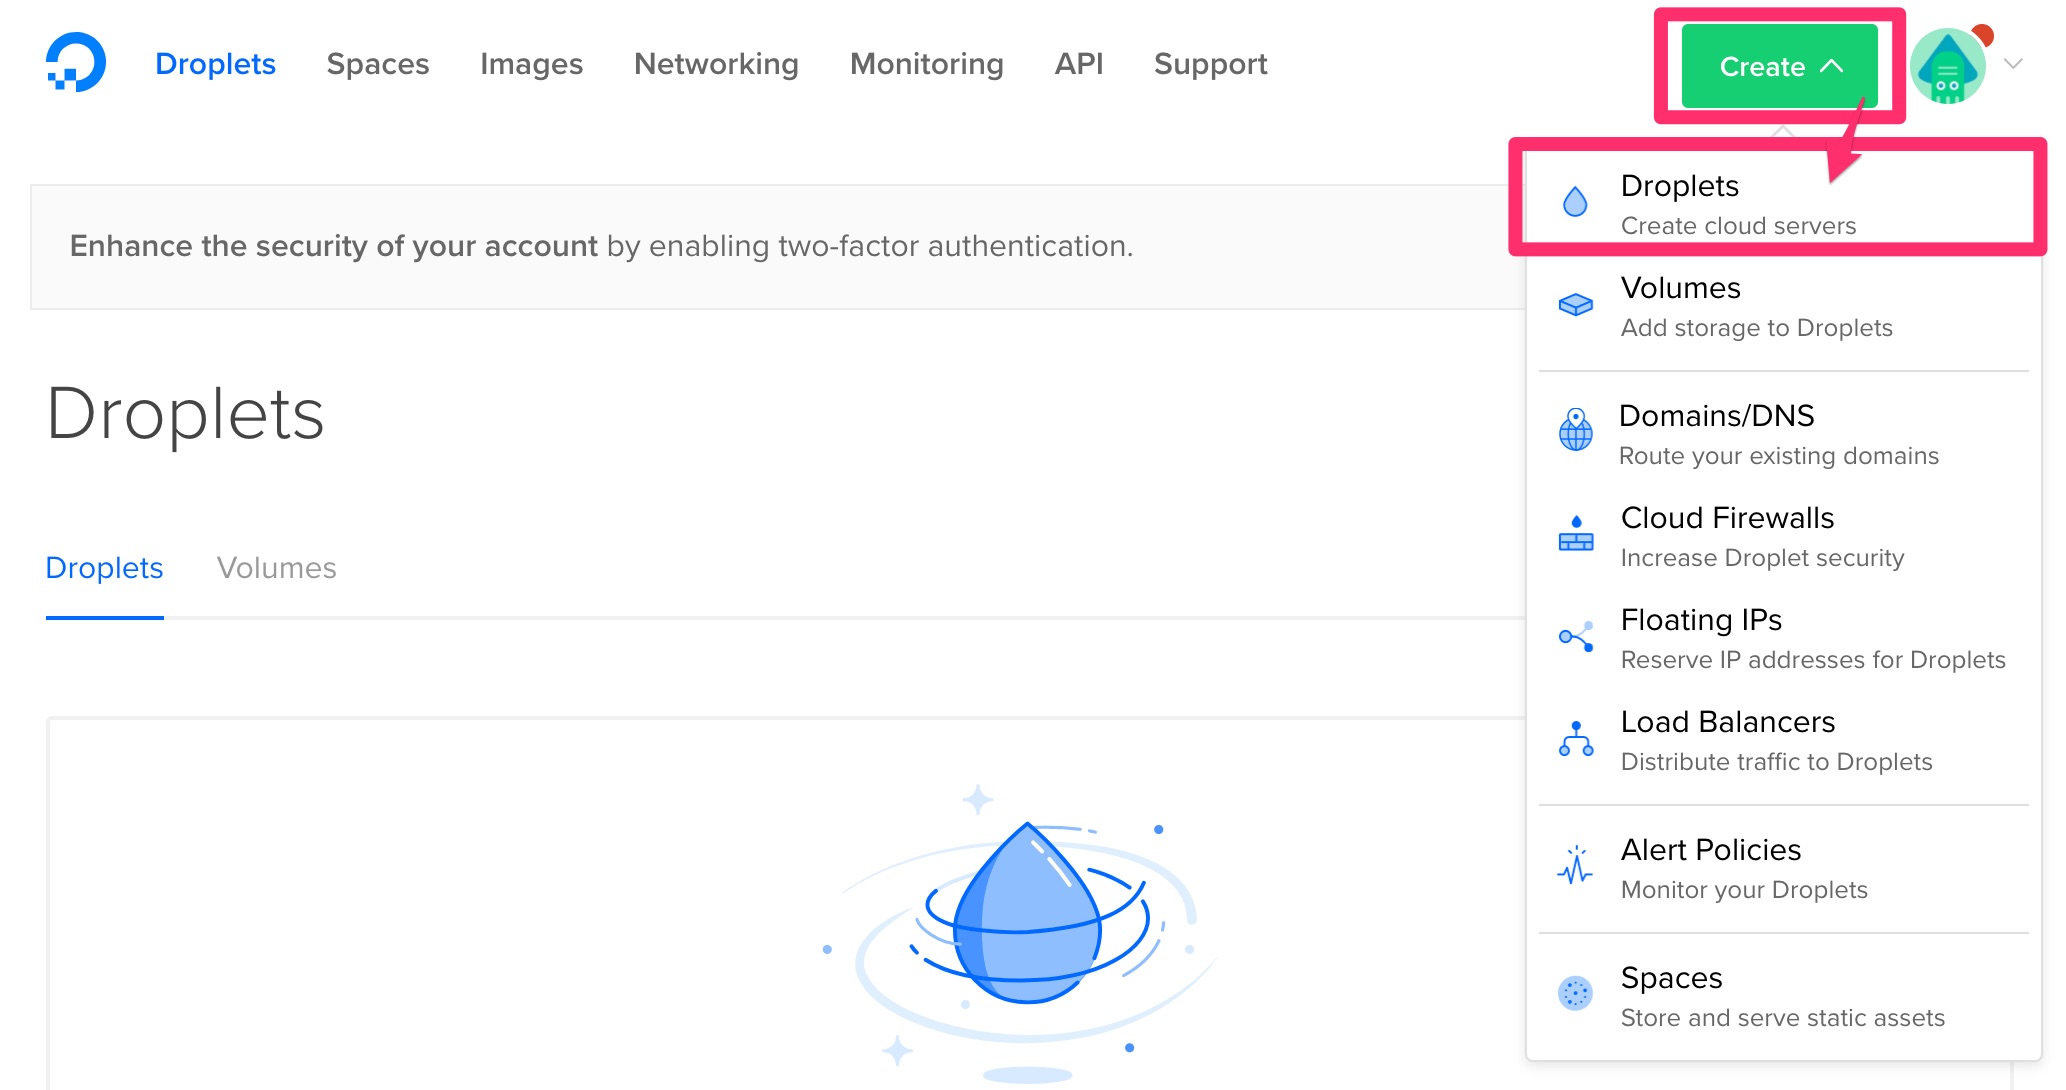
Step 2: Create a new droplet
Click on Create and Droplets
Step 3: Change the configuration of droplet
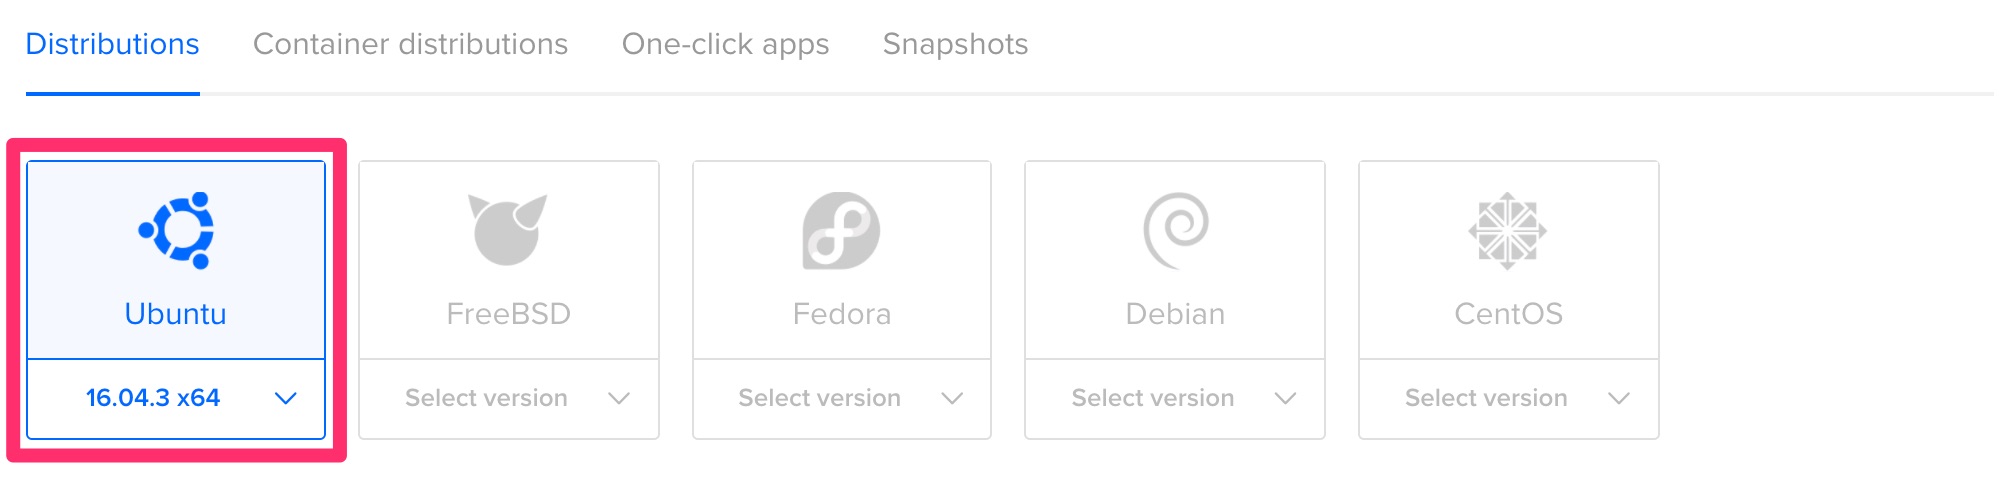
Choose an image Ubuntu 16.04.3 x64:
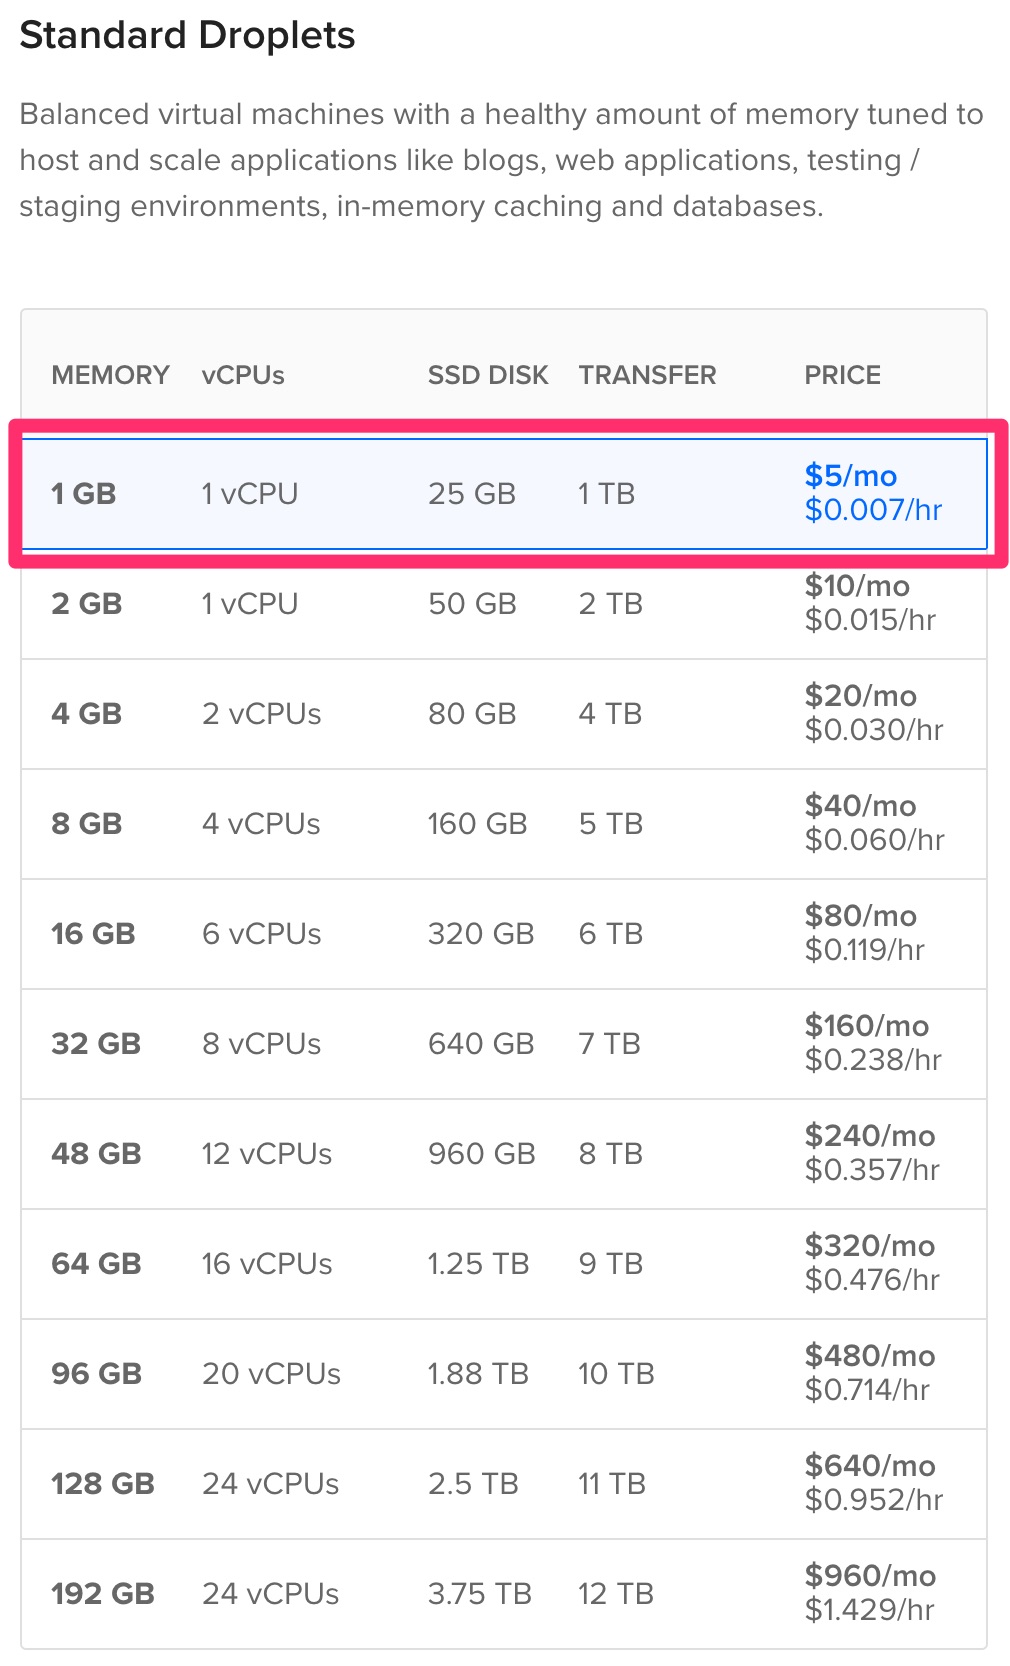
Choose the smallest size on Standard Droplets:
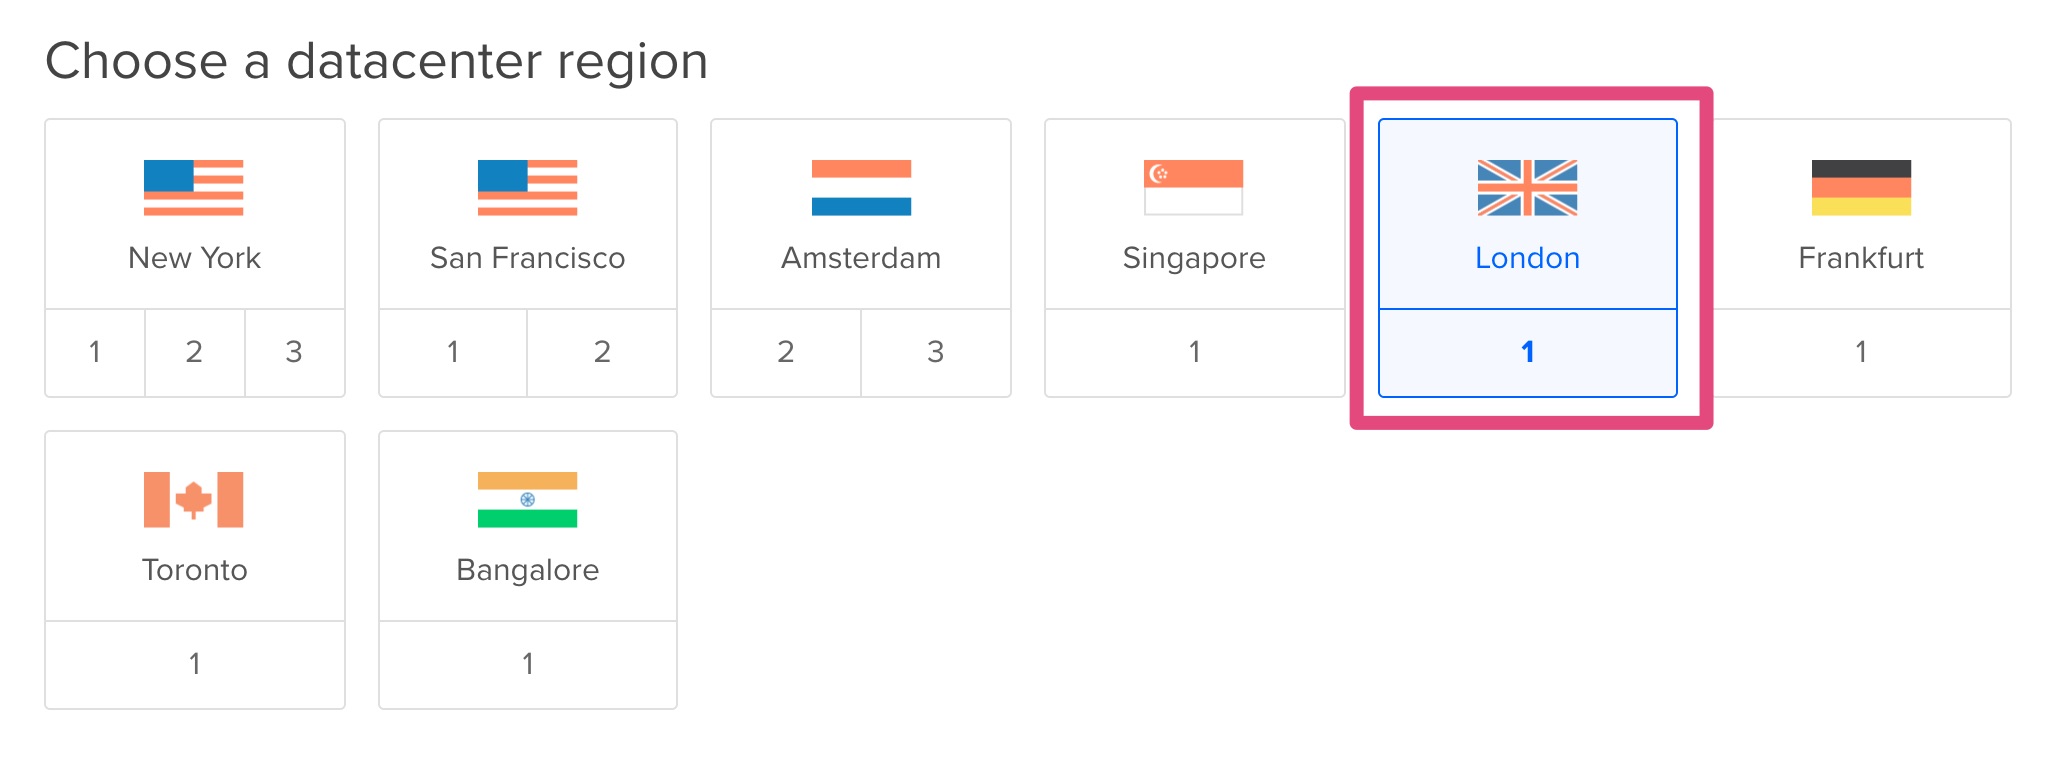
Choose a datacenter (e.g.: London):
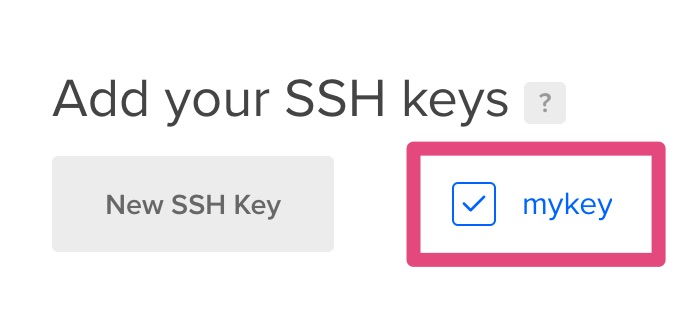
Use the SSH key named mykey:
Step 4: Start the droplet
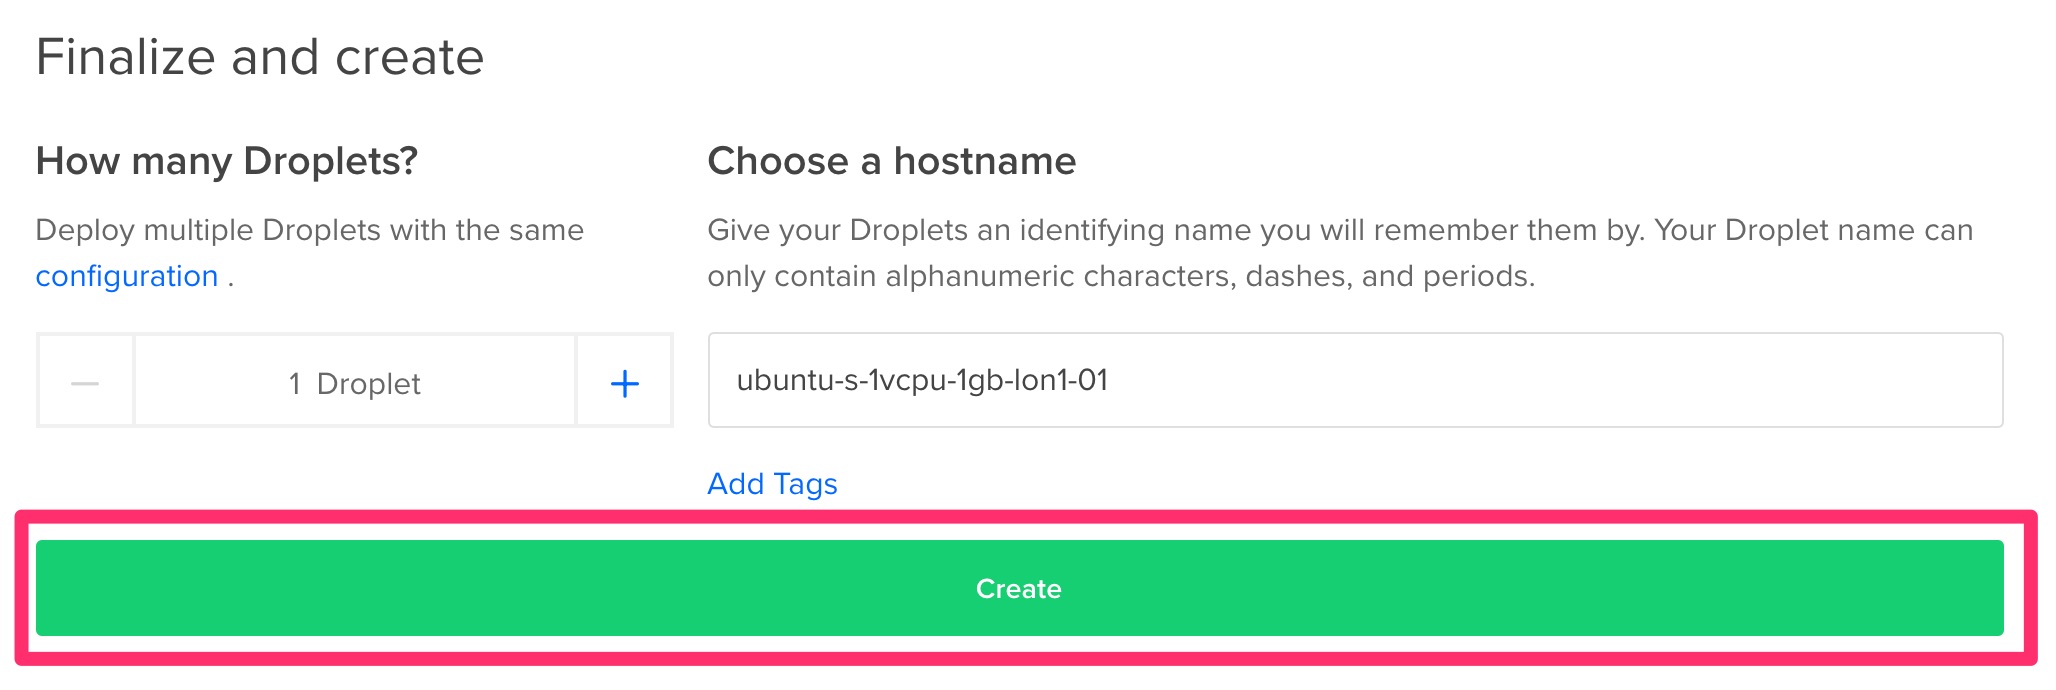
Click on Create
Step 5: Connect to the instance
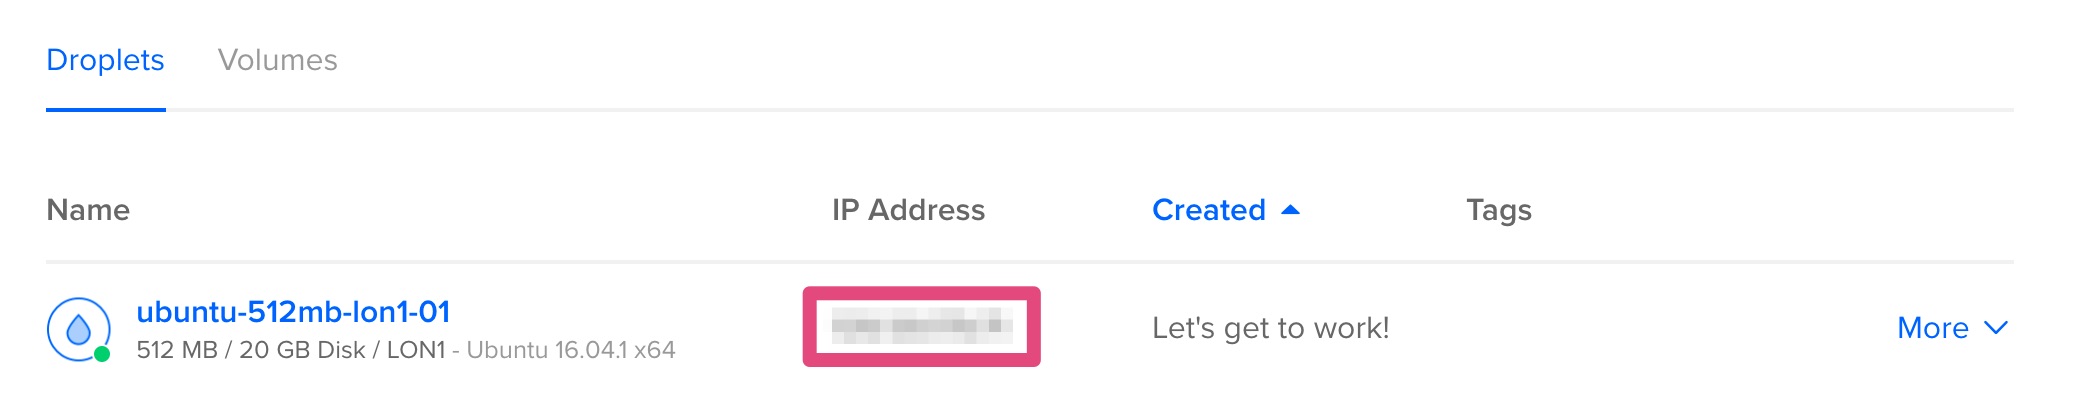
Get the IP:
And enter this command in a terminal:
ssh root@<replace by IP>
Step 6: Install the proxy
Install proxy with:
curl --silent --location https://deb.nodesource.com/setup_8.x | sudo bash -
and:
sudo apt-get install --yes nodejs
and:
curl --silent --location https://raw.githubusercontent.com/fabienvauchelles/scrapoxy/master/tools/install/proxy.js | sudo tee /root/proxy.js > /dev/null
and:
curl --silent --location https://raw.githubusercontent.com/fabienvauchelles/scrapoxy/master/tools/install/proxyup.sh | sudo tee /etc/init.d/proxyup.sh > /dev/null
and:
sudo chmod a+x /etc/init.d/proxyup.sh
and:
sudo update-rc.d proxyup.sh defaults
and:
sudo /etc/init.d/proxyup.sh start
Step 7: Poweroff the droplet
Stop the last command (CTRL-C)
Power off the droplet:
sudo poweroff
The green icon disappears when the droplet is off:

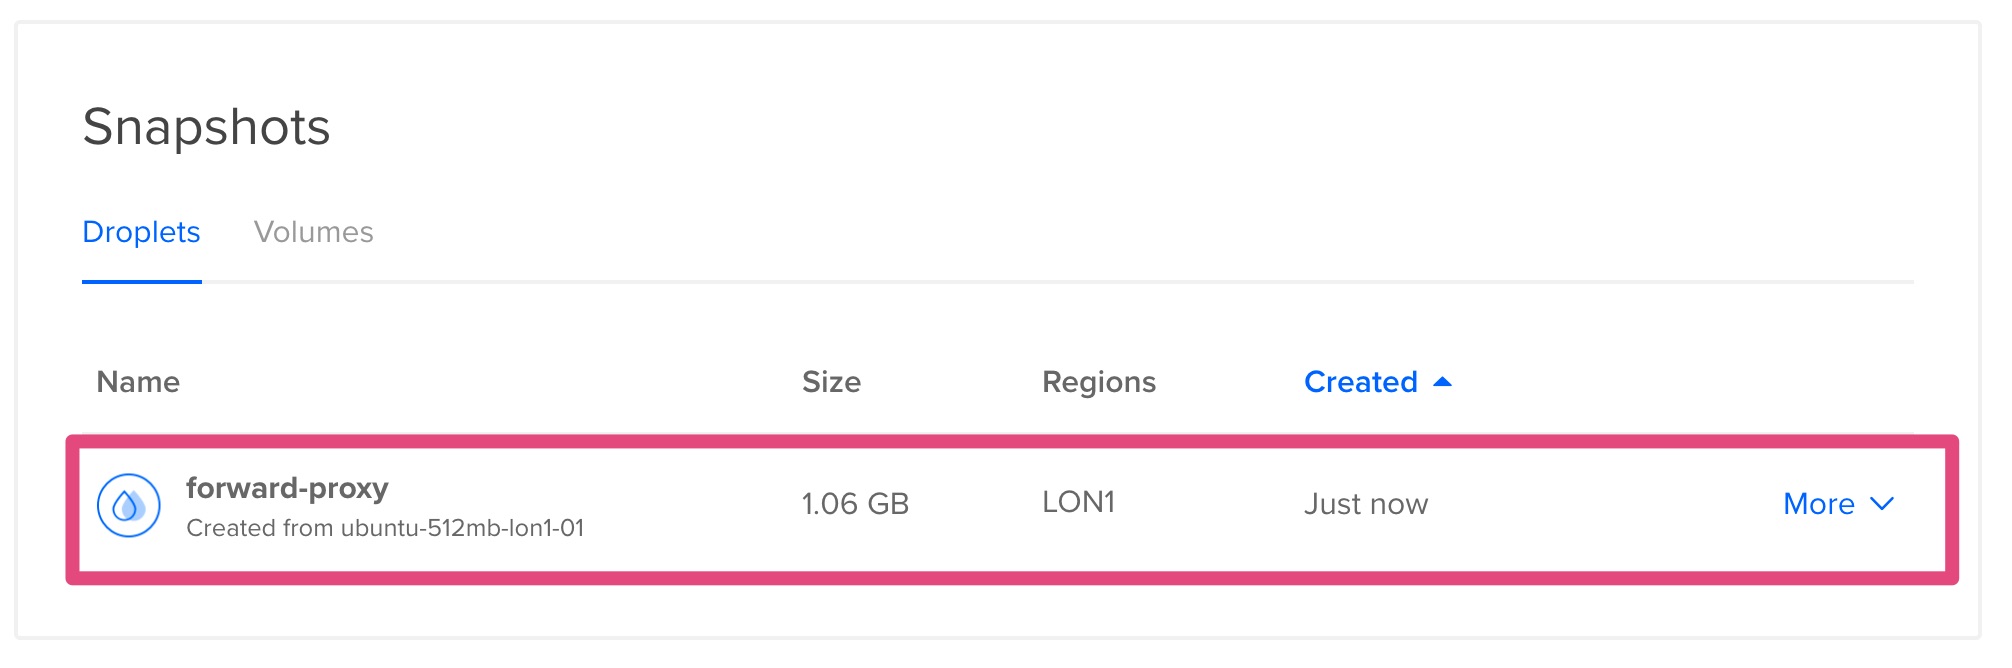
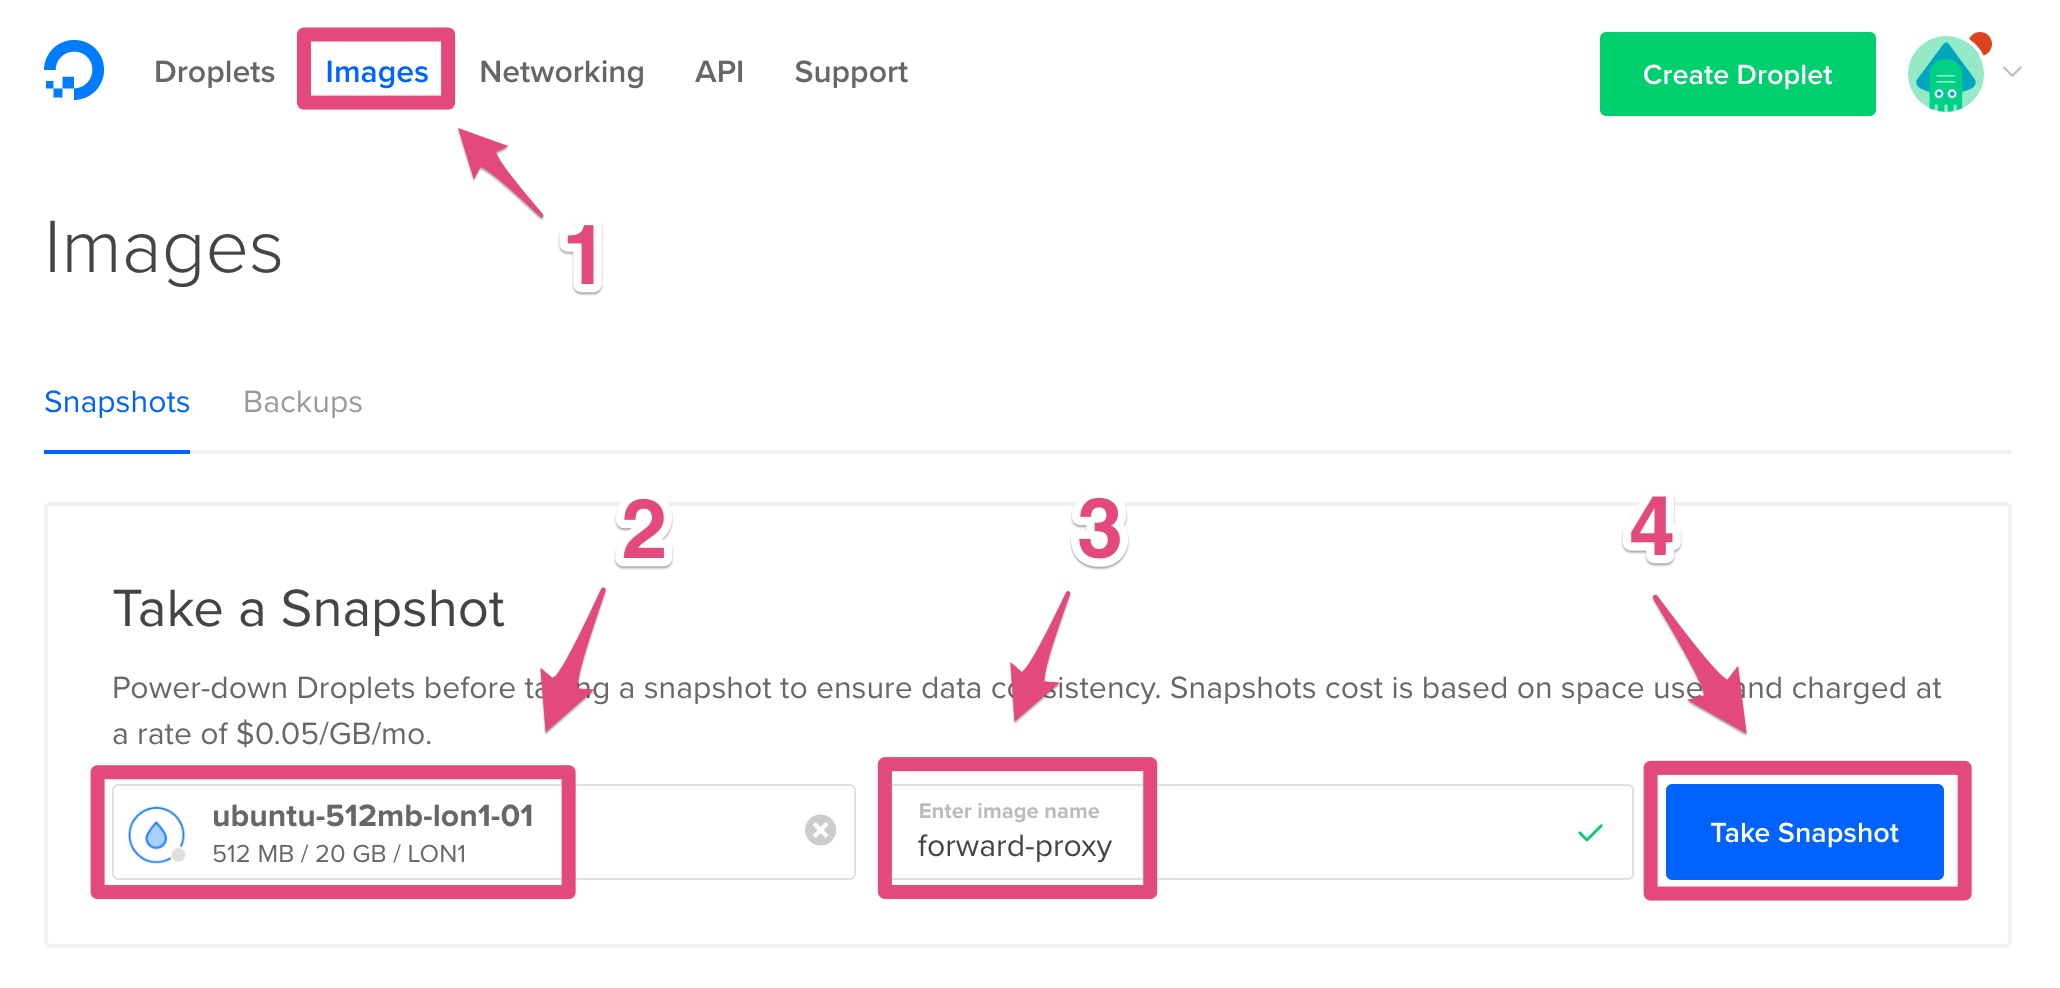
Step 8: Create a backup
Click on Images
Select your droplet
Enter forward-proxy in Image Name
Click on Take Snapshot
Wait a few minutes and the new image appears: